Getting started with Unreal Engine 4
Note: Unreal Engine 4 is no longer in active development and Varjo plugin for Unreal Engine 4 is not receiving updates anymore. We recommend using Unreal Engine 5.
Before you start, make sure that your development setup meets the requirements.
Install Varjo OpenXR plugin for your engine from Unreal Marketplace and either open a project or create a new one. Alternatively, you can download and install the plugin manually for your project.
To get access to all features and performance optimizations, we recommend that you always use the Varjo OpenXR plugin when developing for Varjo headsets. You can also enable OpenXR in Unreal without Varjo-specific features.
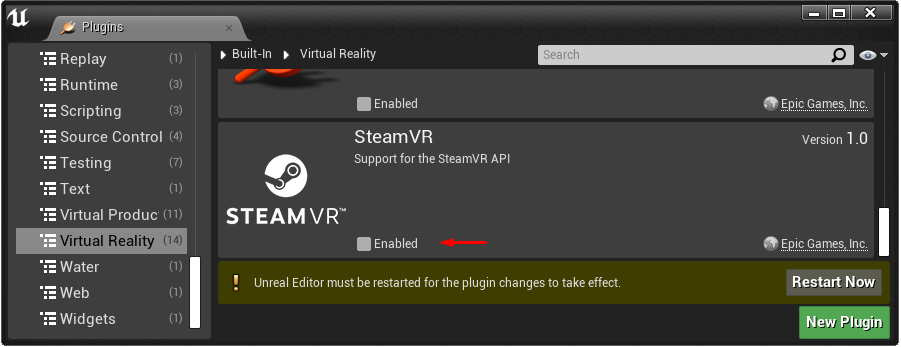
Disable the SteamVR plugin if enabled.

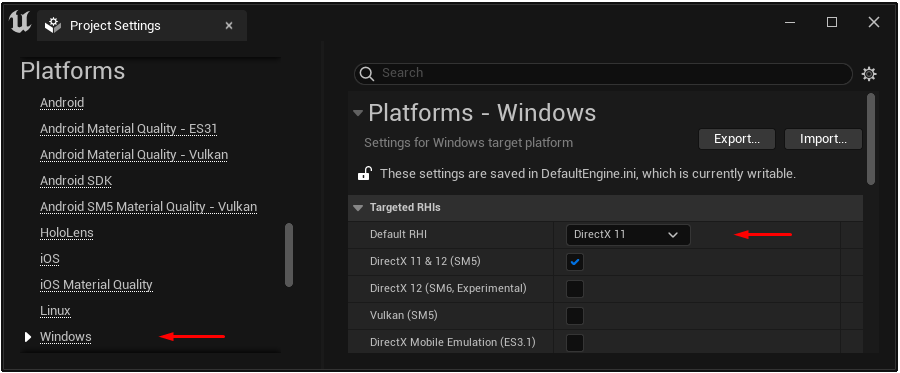
If you are using Unreal Engine 5, switch Default RHI to DirectX 11 in Project Settings > Platforms > Windows > Targeted RHIs.
DirectX 12 support for OpenXR will be added in a coming Varjo Base release.

Disable instanced stereo rendering and mobile multi-view under Project Settings > Rendering > VR. Restart the project.

Varjo OpenXR plugin is now ready for use. You can find the plugin settings under Project Settings > Plugins > Varjo OpenXR.
Select VR Preview play mode and click Play to see the scene inside the headset.

A good way to get started is by using the Varjo OpenXR example project. It is built on the Unreal VR Template and comes with simple examples for utilizing all supported features.
See Recommended Settings for unsupported rendering features and instructions on how to optimize visual quality and performance.
VR Template
Unreal VR Template is a good starting point for your project.