Camera render position
Defining camera render position
To achieve a realistic mixed reality experience, we recommend that you familiarize yourself with the rendering options available in the Varjo API.
Varjo headsets use video pass-through cameras to create the mixed reality image. The cameras are located in front of the user’s eyes, which leads to an offset in depth perception so that real-world objects in the video pass-through image appear larger than they are in real life. The image below gives a visualization of the difference between what the camera sees and what the user would see in real life.
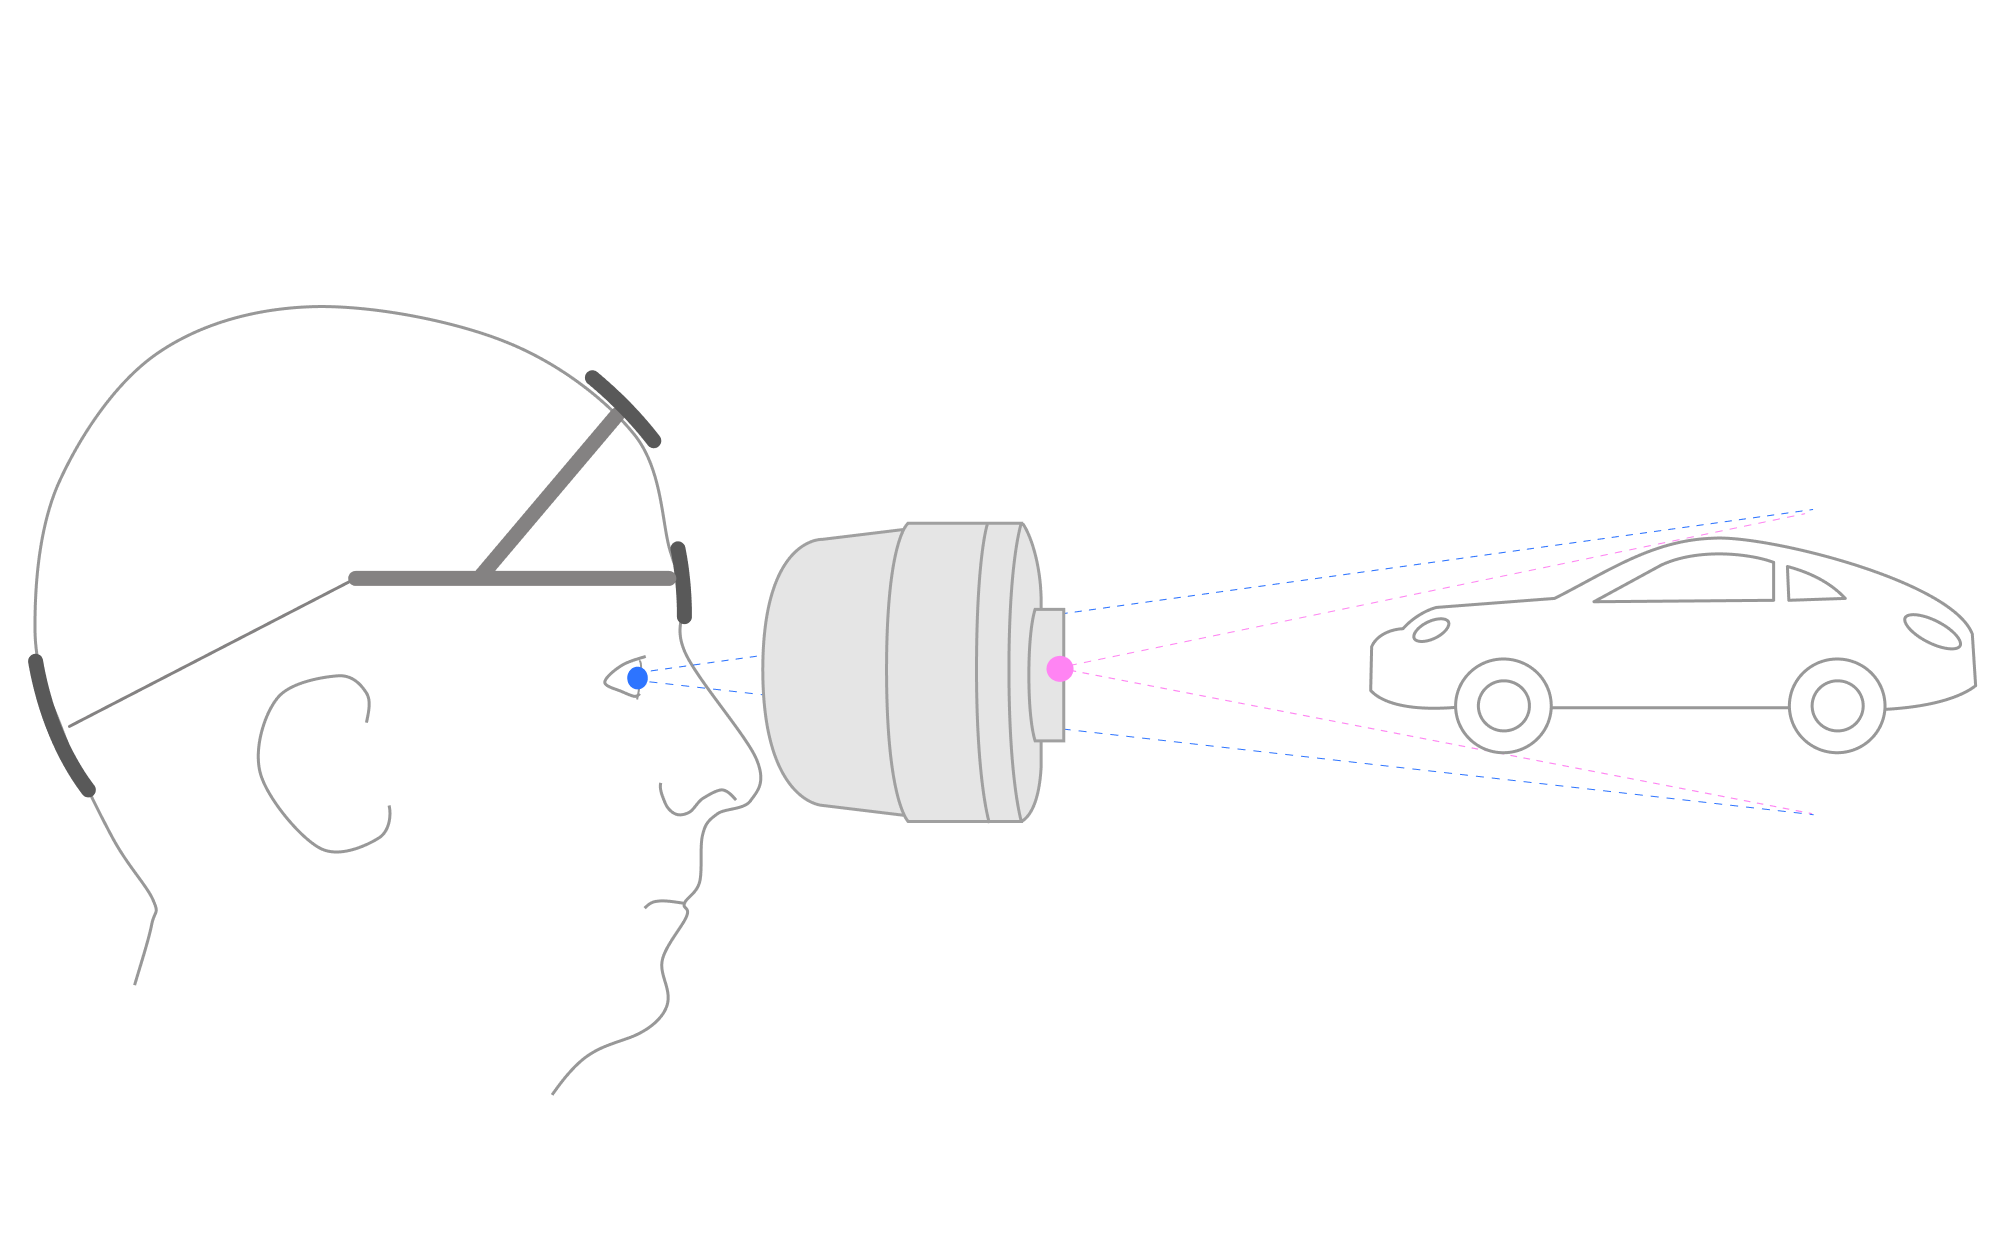
This magnification effect is pronounced for objects that are close to the user – for example, their hands may appear unnaturally large in the image. The effect decreases with distance, so that objects at a distance of 2 meters already appear close to their actual size, and the sizes eventually converge at infinity. Note that while the objects’ sizes may differ, their geometry, relative sizes, locations, etc. remain accurate. The extent of the magnification effect ultimately depends both on the application itself and the user’s physiology, as the human visual system is highly adaptive in this type of setting.
When blending the video pass-through image with virtual content, it is important that their relative geometries – position, size, and disparity – match one another. To achieve this, Varjo’s software automatically places the virtual reality cameras in the same position as the physical cameras when the video pass-through feature is enabled (varjo_MRSetVideoRender in the API). This allows virtual and real-world content to appear at the same distance and on the same plane when viewed together. While this can be observed as an apparent jump in the location of virtual objects compared to VR-only content, this does not cause any distortion in the object geometry or location; it is only the viewer’s location that changes.
In some cases, moving the VR content to match the real-world position may not be desirable. You can override the offset (varjo_MRSetVROffset in API), so that VR content is rendered from the location of the user’s eyes while the video pass-through image uses the camera locations. Which setting is most beneficial for your application depends on the type of content and use case. Below you can find some examples to help you choose the best rendering settings for your application:
Case 1: Comparing virtual and real-world objects side by side
You want to compare virtual and real-world objects, for example, a virtual car next to a real car. Contents are typically viewed from a distance of more than 1 meter (3 feet).
In this case, we recommended that you use the camera position for VR rendering. This is the default setting for mixed reality.
varjo_MRSetVRViewOffset(session, 1.0f);
Benefits:
- Virtual and real-world objects appear in the same size.
- Virtual objects appear stable in their environment and do not “float”.
- Depth occlusion can be used to show real hands in the scene. The hands will appear in the correct position relative to virtual and real-world objects.
Limitations:
- Both virtual and real-world objects appear slightly larger, as if observed from a few centimeters / inches closer.
- When observing virtual objects up close (from less than 1 meter / 3 feet), moving your head will cause them to move unrealistically.
Case 2: Observing virtual objects from a close distance
You want to examine VR objects from up close, for example, to see details in their appearance or texture. Real-world objects are typically in the background of the scene or otherwise less important.
In this case, we recommend that you use the physical eye position for VR rendering.
varjo_MRSetVRViewOffset(session, 0.0f);
Benefits:
- Virtual objects appear in the correct size as they would in real life.
- Virtual objects behave naturally when you turn your head.
Limitations:
- Virtual objects appear a bit smaller compared to real-world objects.
- Virtual objects may appear to float in the real-world environment.
- Real-world contents revealed through depth occlusion will not match the size and position of VR contents.
- If you still want to use hand tracking in your application, we recommend that you use virtual hands instead of depth occlusion. In this case, the VR hands will stay in sync with VR objects and appear in natural positions.
Case 3: Interacting with real and physical objects
You want to extend or replace parts of the real world with virtual content. A typical use case is a physical simulator setup or control room with real dashboards, switches, and buttons, where you overlay virtual content such as displays or controls on top of the real world. VR content can also be displayed as a background scene for the simulator.
In this case, we recommend that you use the camera position for VR rendering. This is the default setting for mixed reality.
varjo_MRSetVRViewOffset(session, 1.0f);
Benefits:
- VR objects will sit naturally and realistically in the real-world environment.
- You can freely choose whether to visualize the user’s hands as virtual or real hands using depth occlusion. The hands will always appear in the correct position relative to VR and real-world objects.
Limitations:
- Both virtual and real-world objects appear a bit larger, as if observed from a few centimeters / inches closer.
- When observing virtual objects up close (from less than 1 meter / 3 feet), moving your head will cause them to move unrealistically.
Case 4: Switching between virtual and mixed reality environments
You need to switch frequently between fully virtual and mixed reality modes while observing the virtual objects.
In this case, we recommend that you test both positions to see which setting works best for you.
- If you use the real-world image only as a background for the scene, the physical eye position might be the better choice. One benefit is that virtual objects remain unchanged and appear in the same size in both scenes.
- If you use the real-world image to compare virtual and real-world objects, the camera position would likely be the better option. It has the benefit that real-world and virtual objects appear in the same size and scale when viewed side by side.
Tip: Varjo API also supports offset values between 0.0 and 1.0. You can use this to create a smooth, animated transition between the two rendering positions in case you need to change from one to the other during a session.