Updating an existing Unity project
Note: you are currently viewing documentation for a beta or an older version of Varjo
Note: This page explains the necessary steps needed to launch your existing Unity project on the Varjo headset. If you are creating new project from scratch, refer to the Creating a new Unity project page.
Varjo Unity plugin has been reworked and is distributed in package format. If this is your first installation of the Varjo Unity plugin, simply follow the Installation guide. However, if you have been developing using Varjo Unity plugin prior to 2.2 VarjoBase update, see the instructions below on how to update your project.
Note: Make sure that you have upgraded VarjoBase to the latest version before migrating to the new Varjo Unity plugin.
- Download new Varjo Unity plugin
- Close Unity Editor before attempting plugin update
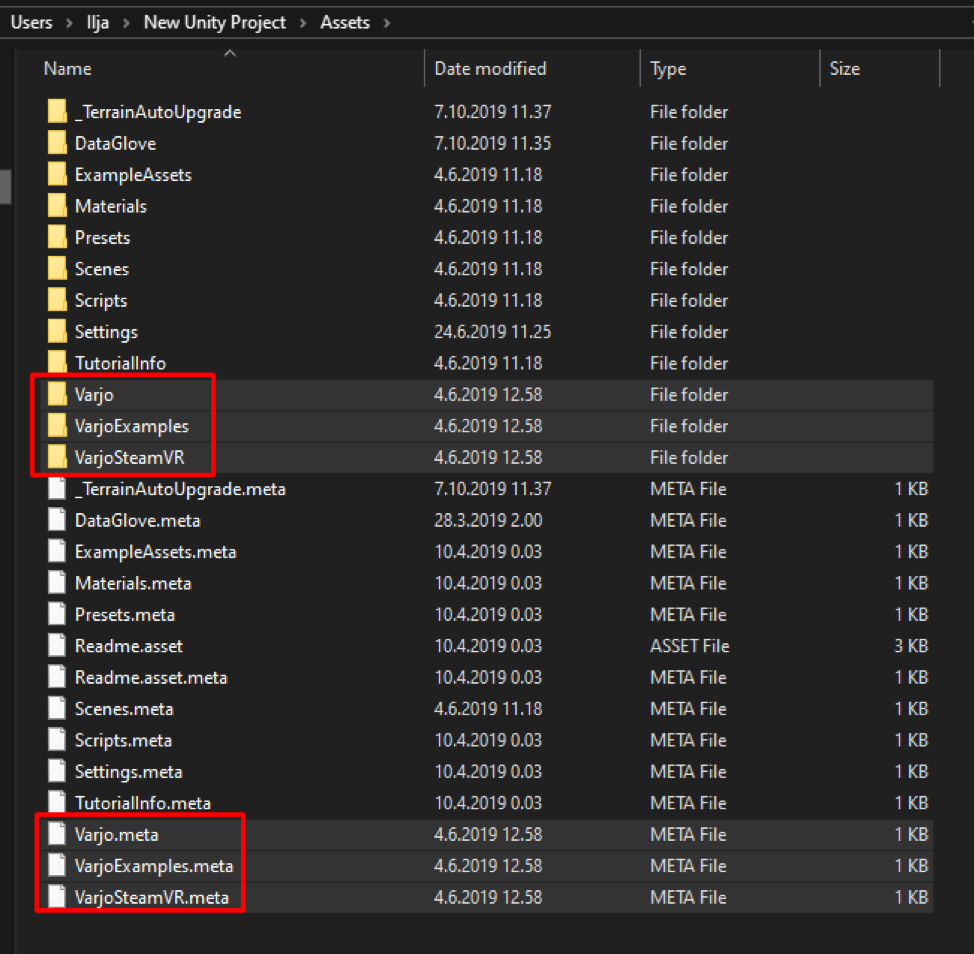
- Navigate to the project folder
- Open Assets folder
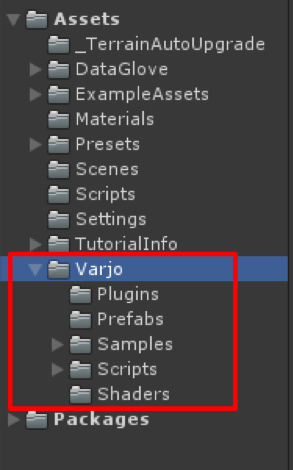
- Delete all the files and folder containing Varjo in their name
- Launch your Unity project
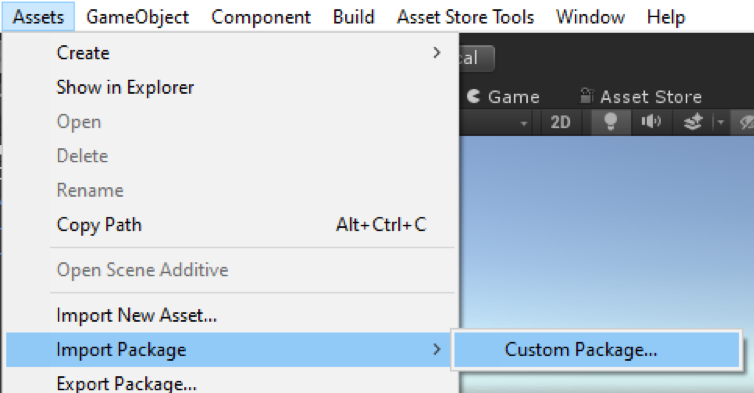
- Go to Assets > Import Package > Custom Package
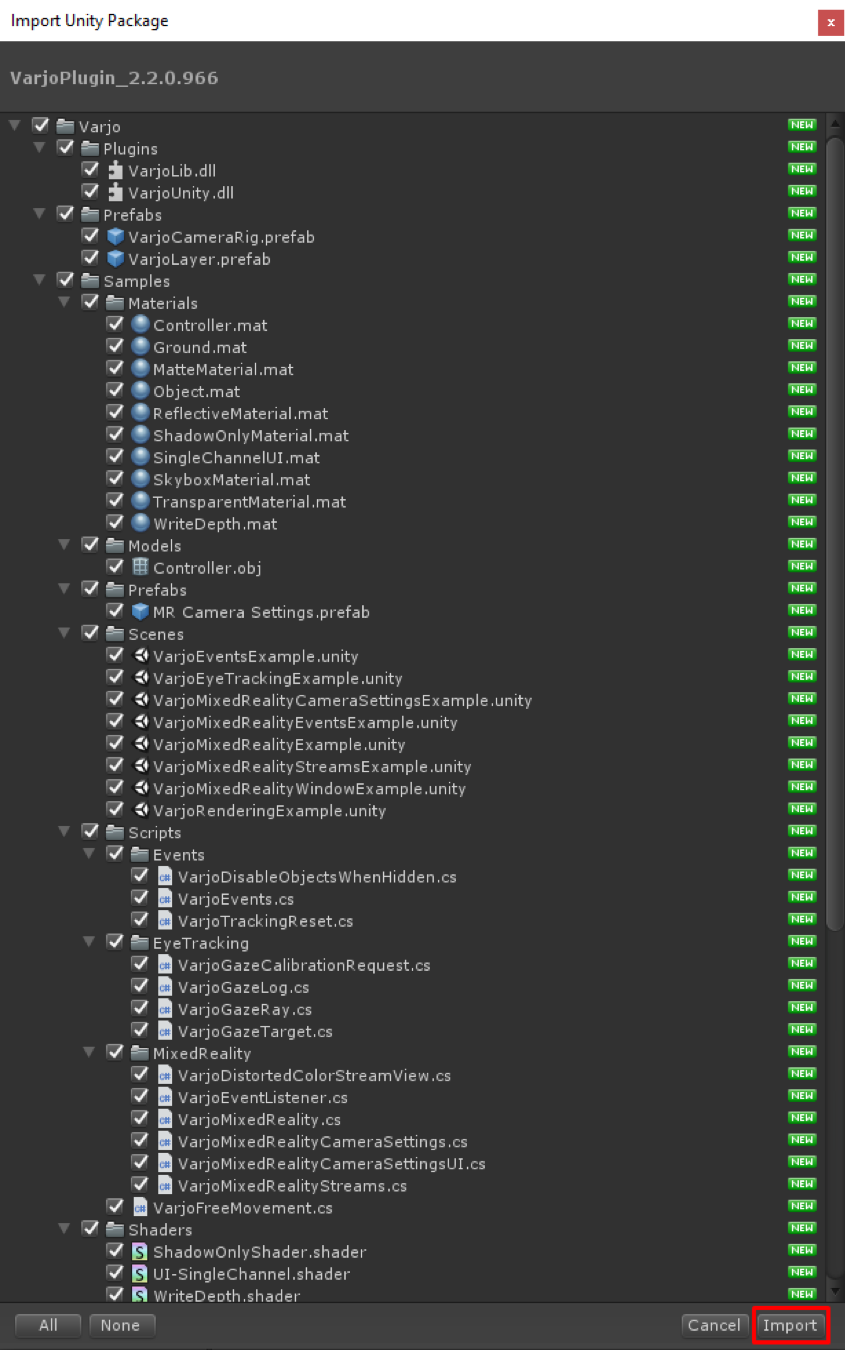
- Select the new Varjo Unity plugin and click Open
- Click Import in the popup window
- Go to Edit > Project Settings
- In Player Settings, under XR Settings enable Virtual Reality Supported
- Drag the OpenVR option above the Oculus option in the Virtual Reality SDKs list
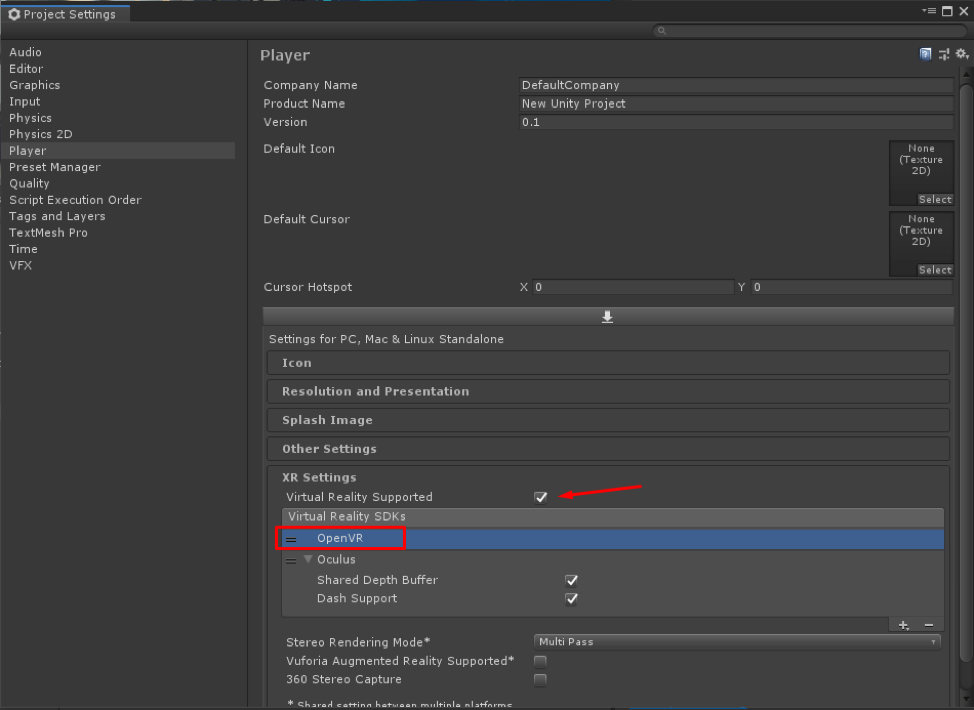
- Close the Project Settings window
- Run your project If you followed all the steps, your project would run as usual. All the examples, scripts, and samples from Varjo Unity plugin could be found in Assets/Varjo folder.