Varjo SDK Examples
Note: you are currently viewing documentation for a beta or an older version of Varjo
On this page you could find following examples:
Benchmark example
Mixed Reality example
Chroma key example
Varjo Marker example
Multi-app example
Benchmark example
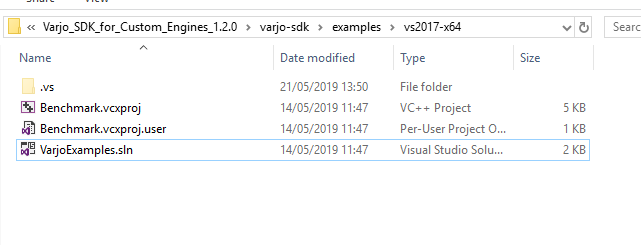
The Benchmark example could be downloaded with Native SDK package. The example can be found under \varjo-sdk\examples \Benchmark\src and you can open the project by running \varjo-sdk\examples\vs2017-x64\VarjoExamples.sln.
This application renders several donuts and a background grid to stress test the Varjo API.
Use main.cpp as a starting point. It contains the main rendering loop and all the frame logic that is not related to graphics.
To learn about the renderer, check the IRenderer.cpp file. Implementation can be found from D3D11Renderer.cpp and GLRenderer.cpp depending on the rendering engine.
.png)
Gaze tracking implementation can be found in the GazeTracking.cpp file. Examples include:
- Checking that gaze tracking is allowed
- Initializing gaze tracking
- Requesting gaze calibration
- Calculating relative gaze vector
- Positioning gaze in relation to user pose
- Calculating gaze position in world coordinates
Mixed Reality example
The mixed reality example could be found in the examples folder which is downloaded with Native SDK package. Open the MRExample folder and see DataStreamer.cpp file for the basic video stream reading implementation.
Begin with obtaining available streams.
configs.resize(varjo_GetDataStreamConfigCount(m_session));
varjo_GetDataStreamConfigs(m_session, configs.data(), static_cast<int32_t>(configs.size()));
Proceed with starting the stream
varjo_StartDataStream(m_session, conf.streamId, varjo_ChannelFlag_Left | varjo_ChannelFlag_Right, dataStreamFrameCallback, this);
Process the frames in the callback functions. Callback contains both left and right frames as a batch.
varjo_Matrix extrinsics = varjo_GetCameraExtrinsics(session, frame->id, frame->frameNumber, channel);
…
varjo_CameraIntrinsics intrinsics = varjo_GetCameraIntrinsics(session, frame->id, frame->frameNumber, channel);
…
bufferId = varjo_GetBufferId(session, frame->id, frame->frameNumber, channel);
…
varjo_BufferMetadata meta = varjo_GetBufferMetadata(m_session, bufferId);
void* cpuData = varjo_GetBufferCPUData(m_session, bufferId);
Close the stream.
Chroma key example
An example of using chroma key can be found in the examples folder included in the Native SDK package. Open the ChromeKeyExample folder and study the main.cpp file to see an example of using the chroma keying feature. The example will show you how to enable chroma key mode, and how to adjust target color and tolerances for chroma keying. Color parameters are represented in the HSV (hue, saturation, brightness value) color space. The hue component specifies an angle on the color wheel, saturation indicates colorfulness, and brightness value denotes intensity. ChromaKeyExample implements a minimalistic VR scene that clears the render targets with a solid color. This is useful as a visualization of the mask produced by the applied chroma key parameters. In actual use the example scene would be replaced by the application’s VR scene, which would then be masked with a chroma key mask. Pressing F1 in the example scene will show a built-in help menu that explains the different keyboard commands. The example is also documented in the source code. You can find all chroma key API calls in the ChromaKeyManager class included in this project. The class provides examples for locking and managing configurations, as well enabling and disabling the chroma key feature for your application.
varjo_MRLockChromaKeyConfig and varjo_MRUnlockChromaKeyConfig are used for locking/unlocking the chroma key configuration for the current session.
varjo_MRSetChromaKey is used for enabling/disabling the chroma keying feature for the current session.
varjo_MRGetChromaKeyConfigCount and varjo_MRGetChromaKeyConfig are used for getting the supported configuration count and actual parameters for each configuration.
varjo_MRSetChromaKeyConfig is used for applying a new set of configuration parameters.
In addition, a new layer-specific flag called varjo_LayerFlag_ChromaKeyMasking has been added to the LayerView class. Chroma keying is applied only to layers with this flag set and only when the feature has been enabled.
Be aware that ChromaKeyExample only serves as an example of how the endpoints can be used, and that these Common helper classes are not meant to be production-quality utility classes for integration.
Varjo Marker example
An example of using Varjo marker can be found in the examples folder included in the Native SDK package. Open the MarkerExample folder and study the MarkerScene.cpp file to see the basic Varjo marker implementation. The example application enables video pass-through and allows the user to see a virtual marker in place of the Varjo marker in their view. In suitable conditions (with good lighting, no reflections, no bending or curing, and a correctly-sized printed marker), the Varjo marker and virtual marker should align perfectly. The example application also allows a user to preview how many markers are visible in the view at any given time.
varjo_WorldGetObjectCount is used for the marker count.
varjo_WorldGetObjects is used to get the marker objects.
varjo_WorldGetPoseComponent and varjo_WorldGetVisualMarkerComponent are used to get the marker pose and other marker-specific data.
Be aware that MarkerExample only serves as an example of how the endpoints can be used, and that these Common helper classes are not meant to be production-quality utility classes for integration.
Multi-app example
The multi-app example shows how to overlay multiple applications on top of each other using session priorities. It renders floating cubes on a background that can be either transparent or non-transparent.
The example uses the MRExample application included in the examples folder of the Native SDK package. MRExample accepts the following command-line arguments:
Assigning priority for an application:
--priority=<priority>
Applications with higher priority values are laid over those with lower priority. Negative values are valid.
Setting a transparent background for MRExample:
--initial_transparent_background