Mixed Reality with Unreal Engine 5
Note: you are currently viewing documentation for a beta or an older version of Varjo
Developing mixed reality applications for XR-3 is quick and easy with Varjo OpenXR plugin. Follow these instructions to get started.
Once you have set up the Varjo OpenXR plugin (see Getting Started with Unreal) follow these instructions to enable mixed reality in your project.
Starting from Unreal Engine 5.0.2, you can enable and disable mixed reality in runtime. Mixed reality can be controlled using the xr.OpenXREnvironmentBlendMode console variable.
Use xr.OpenXREnvironmentBlendMode 3 (= Alpha Blend) to enable video pass-through mixed reality and xr.OpenXREnvironmentBlendMode 1 (= Opaque) to disable it. Mixed reality is enabled by default for mixed reality capable Varjo devices.
Note: Unreal Engine 5.0 doesn’t currently do any validation for xr.OpenXREnvironmentBlendMode. Use Varjo-provided functions to determine if mixed reality is supported with the connected device.
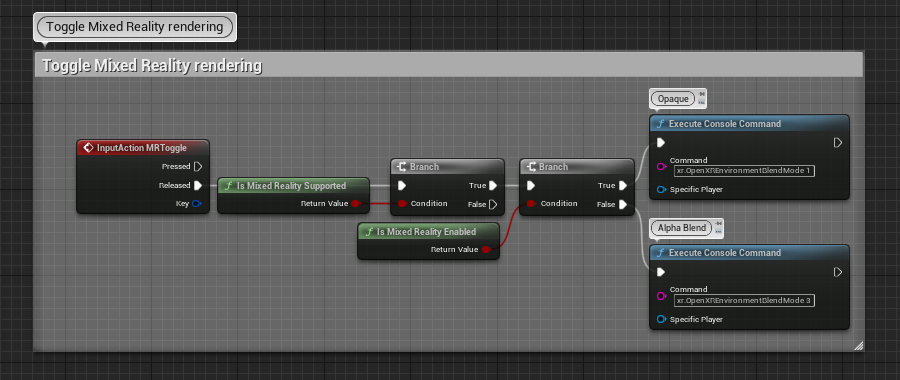
Use IsMixedRealitySupported blueprint node to determine if mixed reality is available for the currently connected device.
Use IsMixedRealityEnabled blueprint node to check if mixed reality is currently enabled.
A simple bluebrint for controlling mixed reality could look like this.
When mixed reality is enabled, you will see the image from the video pass-through cameras when your application renders 0 in the color buffer.
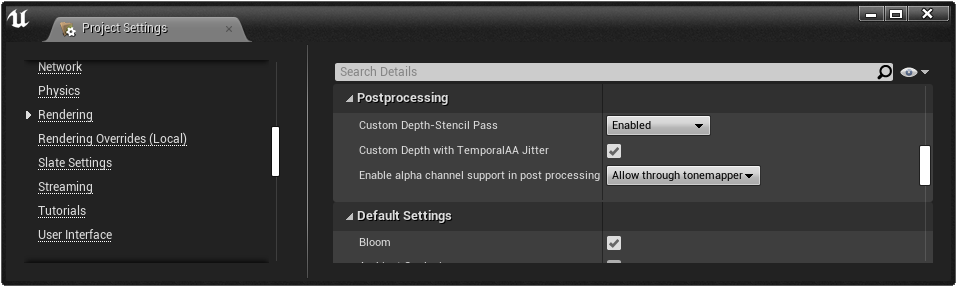
The easiest way to control the alpha channel is by using custom post processing. First you need to enable the alpha channel. In Project Settings > Rendering > Postprocessing, set Enable alpha channel support in post processing to Allow through tonemapper.
Note: If your project is using quality setting level Epic or higher, the used color format (PF_FloatRGBA 64Bit) has an additional alpha channel and it may cause you to see only video pass-through image in the headset. To fix this, either change Effects to level High in Engine Scalability Settings or set r.SceneColorFormat 3 (PF_FloatRGB 32Bit).
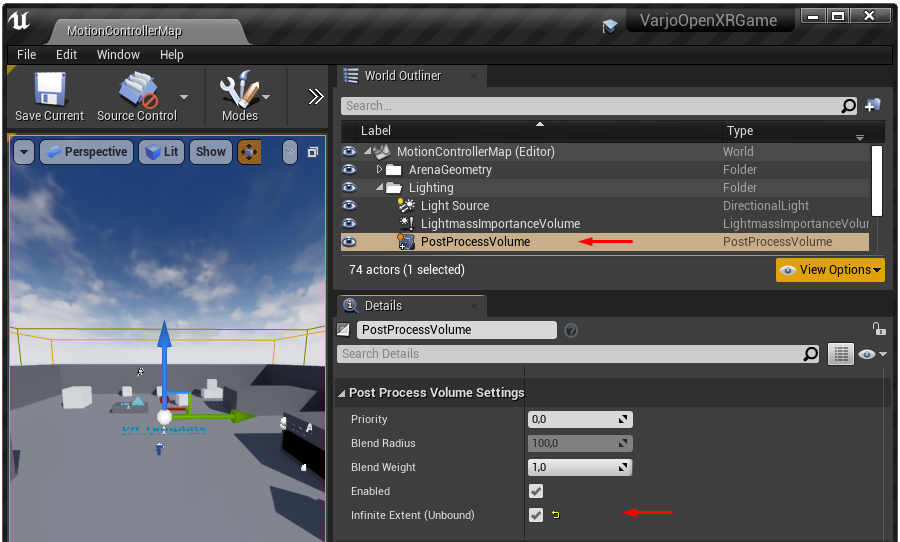
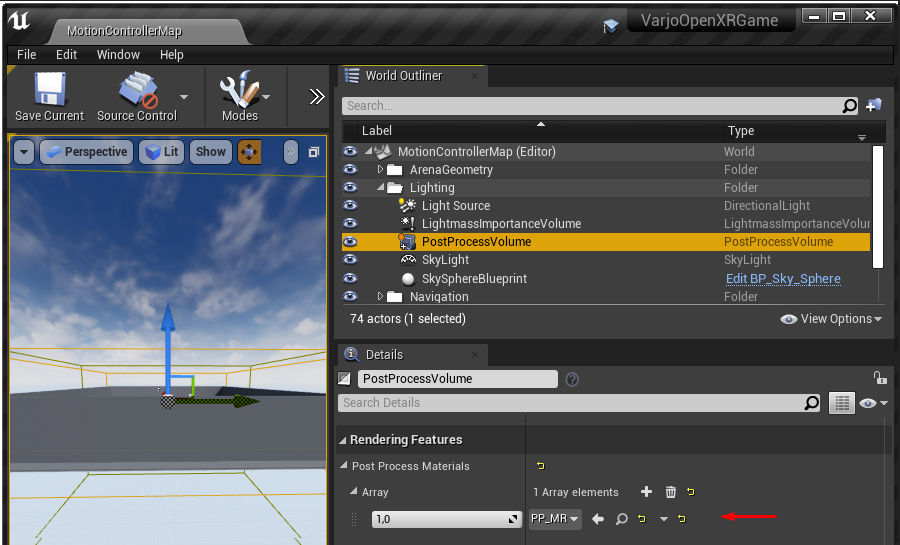
Add a Post Process Volume in your scene and enable Infinite Extent (Unbound) under Post Process Volume Settings in the Details panel.
Next you need to create a post process material for controlling the alpha channel. Create a new material in your project.
Open the material in the Material Editor.
In Details > Material, select Post Process in the Material Domain field.
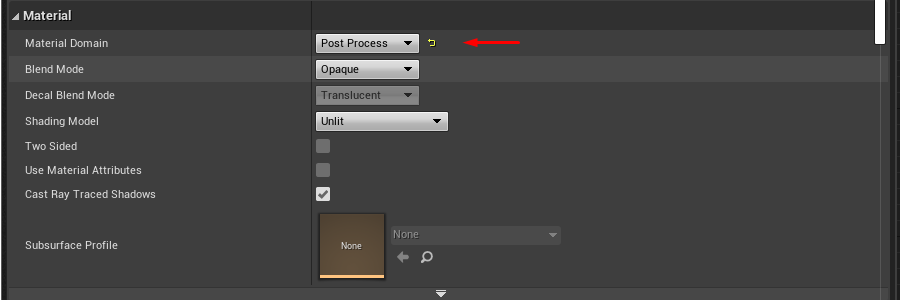
In Details > Post Process Material, enable Output Alpha.

Save the material and go back to the Details panel of the Post Process Volume.
Click + in Rendering Features > Post Process Materials > Array, select Asset reference in the dropdown appearing below it and select the post process material you just created.
Your post process material is now active and affecting the rendering. Now you just have to edit the material to achieve the desired end result. Open the post process material in the Material Editor.
Alpha channel can be controlled in many ways. This example shows how to show the image from video pass-through cameras in the background using scene depth.

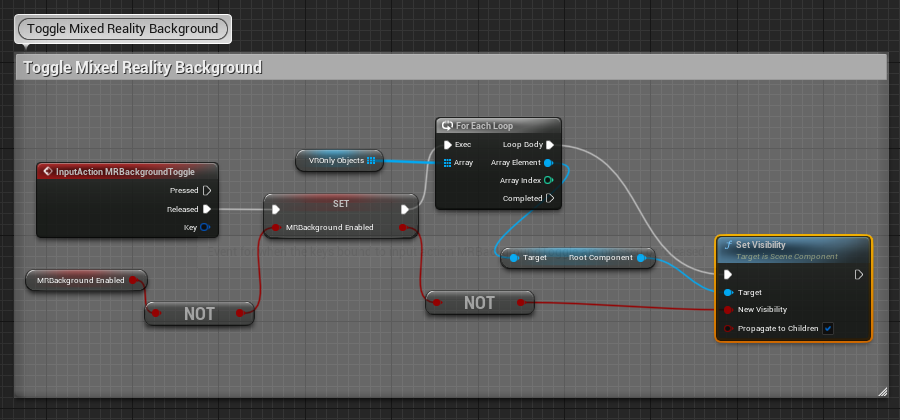
If you disable sky sphere, you should now be able to see the mixed reality in the background. In this example we have a VR Only Objects list, which contains the sky sphere and other objects we want to hide in mixed reality mode. When toggling the mixed reality background, we simply iterate through this list and set the visibility.