Varjo Markers
Note: you are currently viewing documentation for a beta or an older version of Varjo
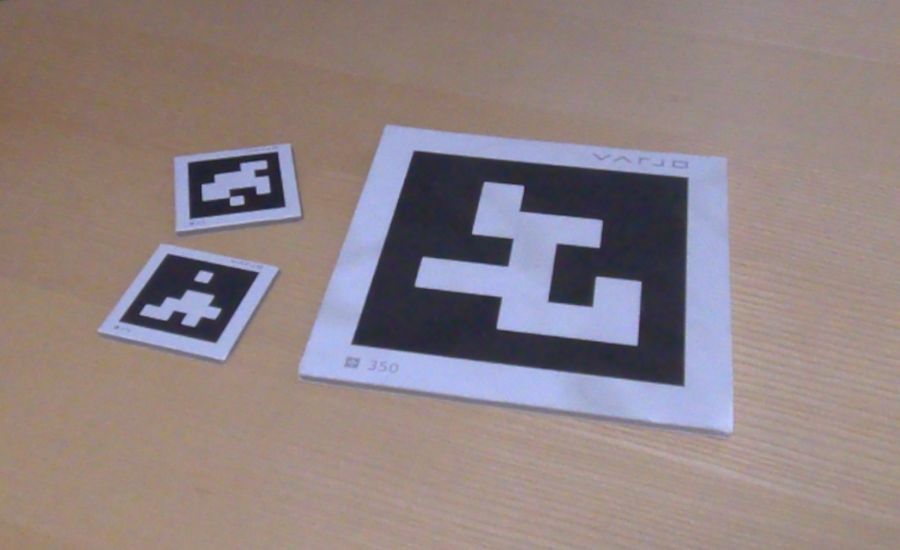
Varjo Markers can be used to track static or dynamic real-world objects using the video pass-through cameras on XR-3 and XR-1 Developer Edition.
See Varjo Markers for more general information and printing instructions.
Varjo Markers are typically used in mixed reality applications, but can be also used without video pass-through rendering in virtual reality applications to align virtual objects in the scene with physical objects in the real world.
Using Varjo Markers
If you don’t have any printed markers yet, you can find the printing instructions from Varjo Markers.
If you want to use markers with video pass-through, enable the mixed reality cameras as described in Mixed Reality with Unreal.
You can check if Varjo Markers are supported using Is Varjo Markers Supported blueprint node.
Enable Varjo Marker tracking with Set Varjo Marker Tracking Enabled. Blueprint node Is Varjo Marker Tracking Enabled returns the current state.

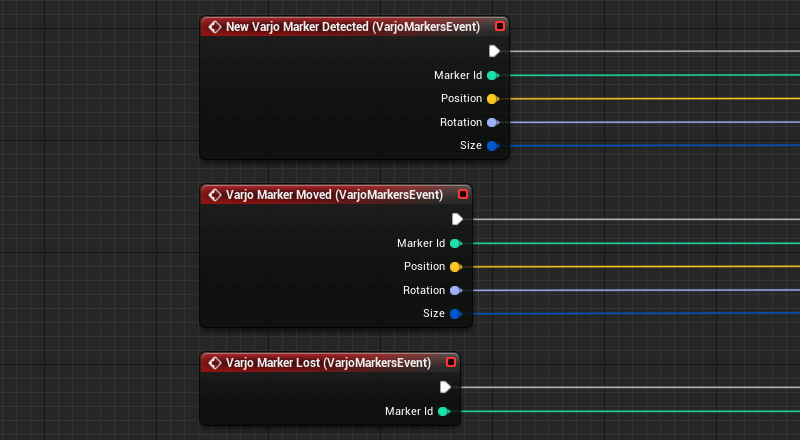
Once Varjo Marker tracking is enabled, you can retrieve updates with events. New Varjo Marker Detected is triggered when a new marker comes visible to the video pass-through cameras. Varjo Marker Moved triggers every time an already known marker receives an updated pose. Varjo Marker Lost is triggered when a known marker has been out of sight for a given timeout.
All events provide a Marker ID, which matches the ID on the printed marker. In addition, New Varjo Marker Detected and Varjo Marker Lost events provide Position, Rotation and Size for the marker. The size of a marker never changes and it’s provided in Unreal units, taking World to Meters scale into account so the size always matches the physical marker.
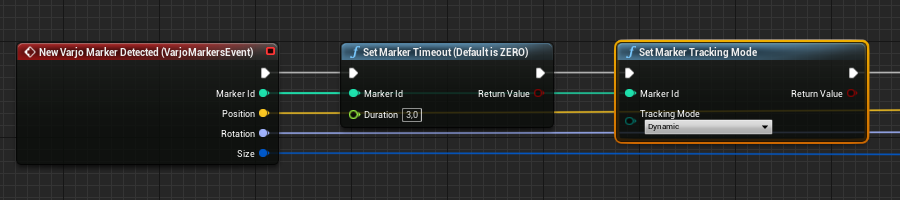
You can set a timeout for each marker using the Set Marker Timeout node. This is how many seconds the marker can be out of sight before it’s considered lost and Varjo Marker Lost event is triggered. The default is 0, but it’s recommended to set a longer timeout.
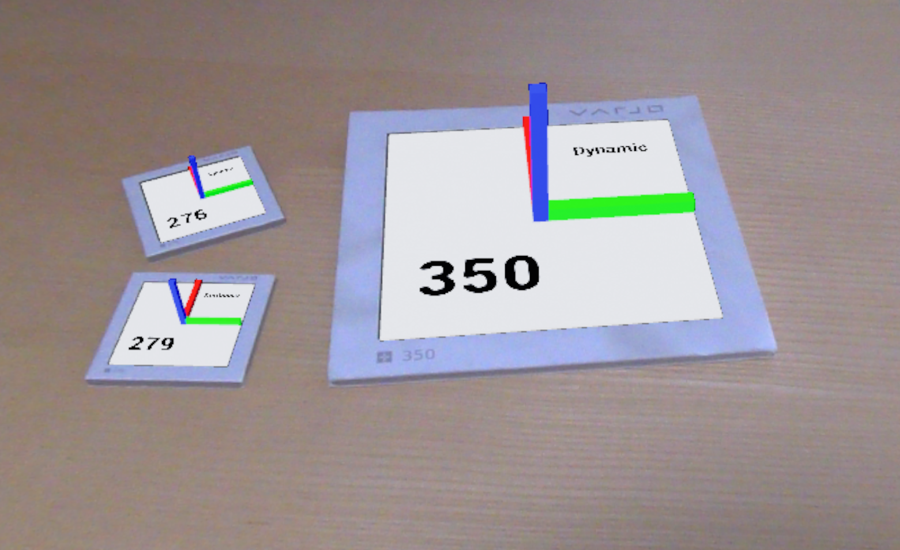
Varjo Markers have two tracking modes; Stationary and Dynamic. The default tracking mode is Stationary, which means the pose is heavily filtered and it’s less responsive to marker’s movements. This is optimal, if you want to align fixed physical elements like a cockpit on a flight simulator with the virtual elements. When the tracking mode is Dynamic, the pose updates are more responsive to marker’s movements. This should be used, if the marker is expected to move. You can set the tracking mode with Set Marker Tracking Mode and check the currently selected mode with Get Marker Tracking Mode.
You can now use these events in blueprints to align virtual objects with real world objects.
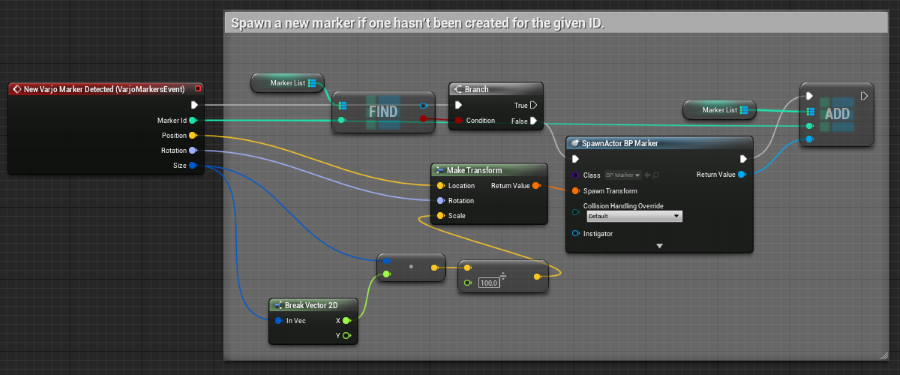
In this example we spawn an Actor for each detected marker. The markers are stored in a map, where they can be accessed using the Marker ID.
The size of the marker contains only width and height, so we reuse the width of the marker for the Z-axis of the scale. The scale is divided by 100, because the side length of the default cube used for visualization here is 100 Unreal units.
On Varjo Marker Moved we update the position and rotation of the Actor and ensure it’s visible. The size of a marker never changes so it’s not necessary to update the scale of the Actor after it’s created.
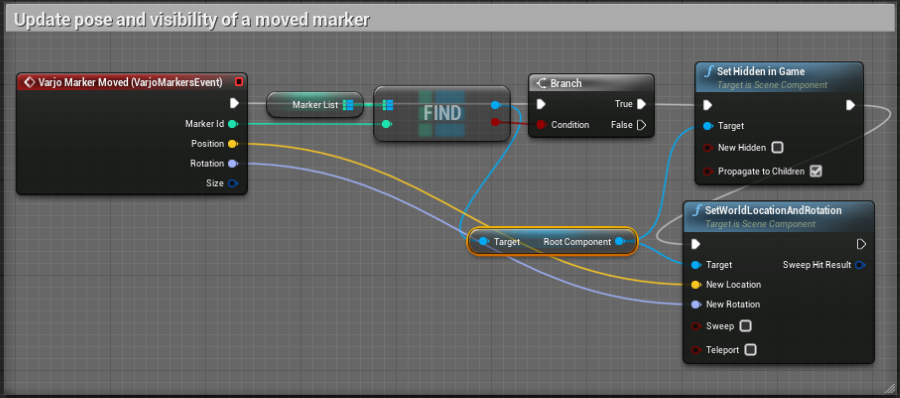
To avoid the need to respawn Actors, we don’t destroy the Actor on Varjo Marker Lost. Instead, we just hide it.

When you hit Play, you should see the spawned Actors perfectly aligned with the Varjo Markers in the real world.
An example for using Varjo Markers can be found from Unreal Examples.