Performance and Visual Quality
Note: you are currently viewing documentation for a beta or an older version of Varjo
This page features performance and visual quality adjustments that will maximize your project’s details and beauty with Varjo headsets. Below are tips that will help to achieve best image using bionic displays without losing performance. Please note that some of the features are not yet available for the Varjo Unreal plugin. Instanced Stereo and Vignette and are only available for the Varjo Unreal Engine version. Notes are added in the corresponding sections.
Please note: All the screenshots in the Unreal’s section of Varjo’s documentation are taken from Unreal Software version 4.21. The Unreal Software User Interface may change in future versions.
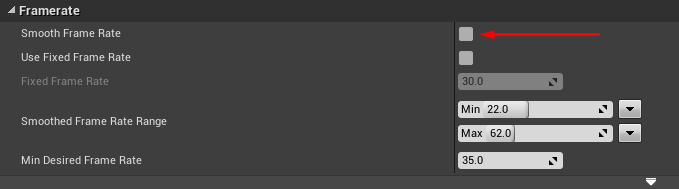
SMOOTH FRAME RATE
It is generally recommended to disable frame rate smoothing for VR. Go to Edit > Project Settings > Engine > General Settings > Framerate and deselect Smooth Frame Rate.
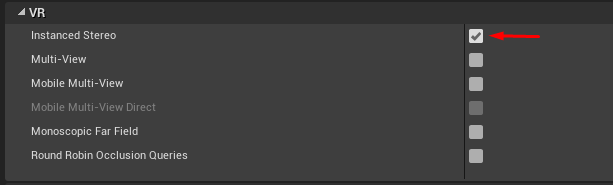
INSTANCED STEREO
Instanced Stereo is supported by the Varjo Unreal Engine 4.21 and above, but not by the Varjo plugin.
This option is recommended to be turned on. Go to Edit > Project Settings… > Rendering > VR and select Instanced Stereo as shown in the picture below:
FORWARD RENDERING AND MSAA
Forward rendering is visually slightly better with roughly the same performance. To use forward rendering, go to Edit > Project Settings… > Rendering and select Forward Renderer as shown in the picture below:

In addition, with forward renderer you can also use MSAA anti-aliasing. Go to Edit > Project Settings… > Rendering > Default Settings and select MSAA in the Anti-Aliasing Method as shown in the picture below:

Performance Tip:
For better performance in some scenes, try: unselecting forward shading and use the Temporal AA anti-aliasing method, instead of the Forward Shading and MSAA.


SCREEN SPACE REFLECTIONS
Due to specifics of Unreal Engine and bionic display, Varjo VR-1 does not yet support screen space effects. To have reflections, use reflection captures instead of screen space reflections. Screen space reflections can be disabled as in the picture below. Screen Space Reflection settings can be found from PostProcessVolume. In order to disable screen space reflections, tick the Intensity tick box and set the value to 0.0.

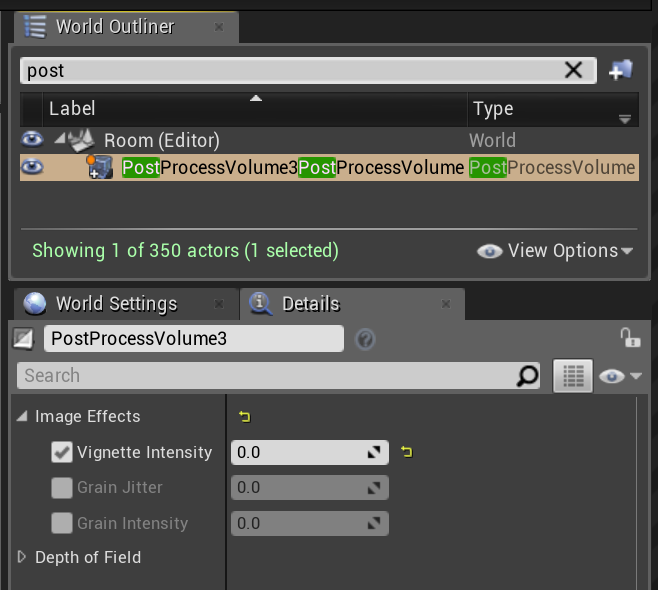
VIGNETTE
Vignette is supported by the Varjo Unreal Engine 4.21 and above, but not by the Varjo plugin.
Vignette settings can be found from PostProcessVolume Details under Lens > Image Effects. In order to disable Vignette, tick the Vignette Intensity tick box and set the value to 0.0.
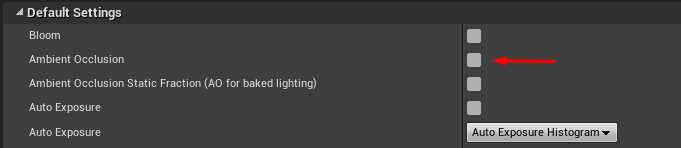
AMBIENT OCCLUSION
Ambient Occlusion is supported by the Varjo Unreal Engine 4.22 and above, but not by the Varjo plugin. You don’t need to change these settings if you run Unreal Engine 4.24 or higher.
Disabling ambient occlusion improves performance with reduction of visual quality. Go to Edit -> Project Settings… > Rendering > Default Settings and unselect the option -> “Ambient Occlusion” as shown in the picture below:
BLOOM
Bloom supported by the Varjo Unreal Engine 4.21 and above, but not by the Varjo plugin.
It is a recommended practice to disable the Bloom post-process effect for VR, since it doesn’t perform optimally in VR. Go to Edit > Project Settings… > Rendering > Default Settings and unselect the option as shown in the picture below:

LENS FLARES
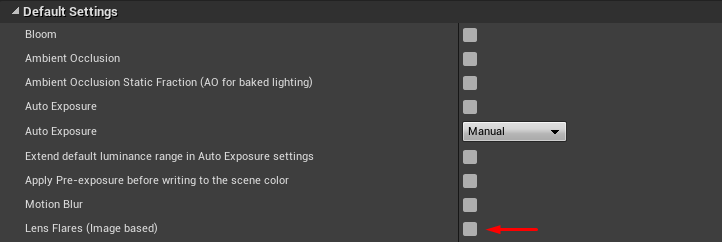
Lens flares are one of the effects that work well on the screen, but feel out of place in VR. As a result it is recommended to disable them. Go to Edit > Project Settings… > Rendering > Default Settings- and unselect the option Lens Flares (Image based) as shown in the picture below:
EXPOSURE
Due to specifics of Unreal Engine and bionic display, the Varjo headset does not perform correctly with auto exposure. This is the reason we recommend using manual and fixed exposure and, for example, tuning off the PostProcessVolume camera settings.
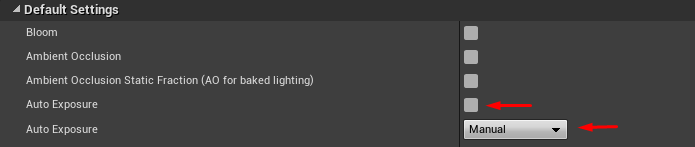
To set the manual exposure in project settings, unselect the Auto Exposure option and set Manual exposure from Edit > Project Settings… > Rendering > Default Settings as shown in the picture below:
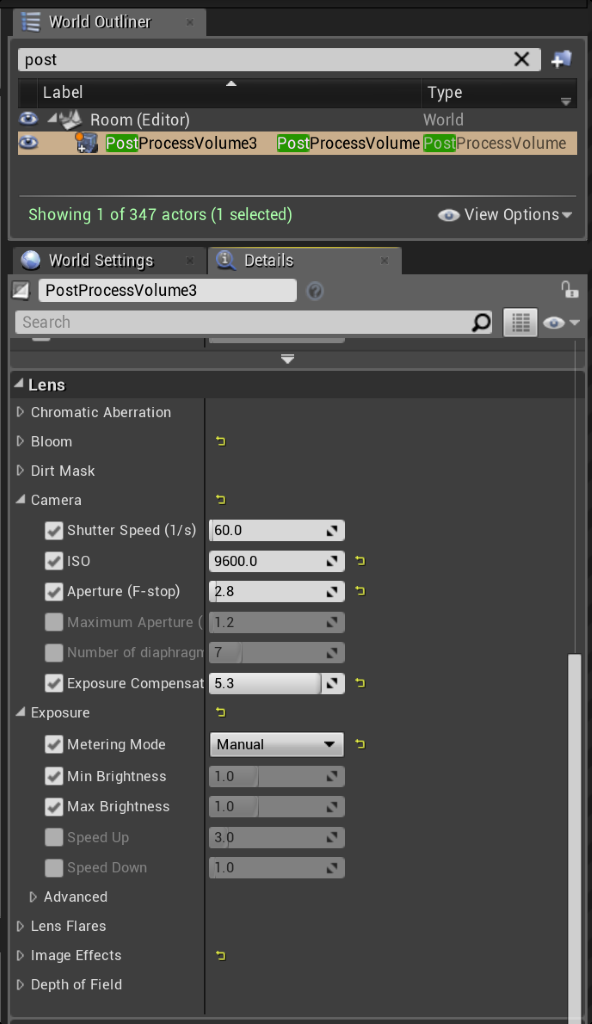
In order to disable PostProcessVolume, search from World Outliner for your PostProcessVolume (if you have any) and check the settings related to the exposure and camera there. In the picture below, we have enabled the Manual metering mode which means that we use only camera settings. The camera settings are manually tuned in order to make the VR scene look sharp. We can’t recommend specific values, as these settings heavily depend on the scene, so visual tuning work is needed here. Carefully observe to the darkest and most highlighted areas of your scene while trying different settings. Note that lights set in the scene also affect the result.
MOTION BLUR
In general, motion blur works better on a desktop PC than in VR. Disabling VR motion blur is recommended. Go to Edit > Project Settings… > Rendering > Default Settings and unselect Motion Blur as shown in the picture below:
LEVEL OF DETAIL (LOD)
In general, we do not recommend using LOD when the asset shape or texture changes significantly between the LOD levels. This is because of the technology behind bionic display. Using LOD might negatively affect visual quality. In some cases, where performance is the key value over visual quality, it is good to use LOD.
PLANAR REFLECTIONS
Planar Reflections supported by the Varjo Unreal Engine 4.22 and above, but not by the Varjo plugin.
While enabling and using Planar Reflections in your project will give you reasonably accurate reflections, this option will have a direct impact on the project’s performance.
More detail in Unreal Engine documentation.
CASCADE SHADOWS
Cascade Shadows are supported by the Varjo Unreal Engine 4.22 and above, but not by the Varjo plugin. You don’t need to change these settings if you run Unreal Engine 4.24 or higher.
Disabling cascade shadows improve performance with great reduction of visual quality as no shadows are cast.