Getting Started with Varjo Plugin for Unity
Note: you are currently viewing documentation for a beta or an older version of Varjo
Due to the Bionic display, there are some differences between developing for the Varjo headset compared to other VR headsets. Varjo plugin for Unity provides the necessary Unity scripts and plugins in order to render content to the Bionic Displays. The Varjo plugin for Unity also provides scripts for input and controller tracking as for the moment you cannot use Unity’s internal VR functions to do so.
Installation
You can download the Unity plugin from the Downloads page.
- If this is your first installation of the Varjo plugin for Unity, simply unzip Varjo plugin for Unity zip to any folder of your choice and copy the Assets folder to your project. The Varjo plugin for Unity will constantly update, and it is recommended to use the latest version with the latest features.
- For updating instructions for the Varjo plugin for Unity, refer to the “Updating plugin” section.
- Varjo and VarjoSteamVR will be at the root of your assets folder by default. Feel free to move them to a different folder in your project if needed.
Note: All of the screenshots in the Unity section of Varjo’s documentation are taken from Unity software version 2018.3.2f1. The user interface of the Unity software might change in future versions.
Creating new Unity project
If you are creating a new project, follow this guide to make sure everything is working properly:
Creating a new Unity project
Note: Only 64-bit builds are supported by Varjo headsets.
Updating your existing Unity project
If you are migrating a previously developed project to work on the Varjo headset, follow the Updating an existing Unity project guide to make sure your project is compatible.
If you wish to keep your previous project settings, you can unzip only the Assets folder. However, make sure that the settings in the Required Unity Settings section are enabled, otherwise VarjoManager will display an error and won’t work correctly.
Required Unity settings
Apply the following settings before proceeding with developing your project. You can access the Settings through Edit > Project Settings
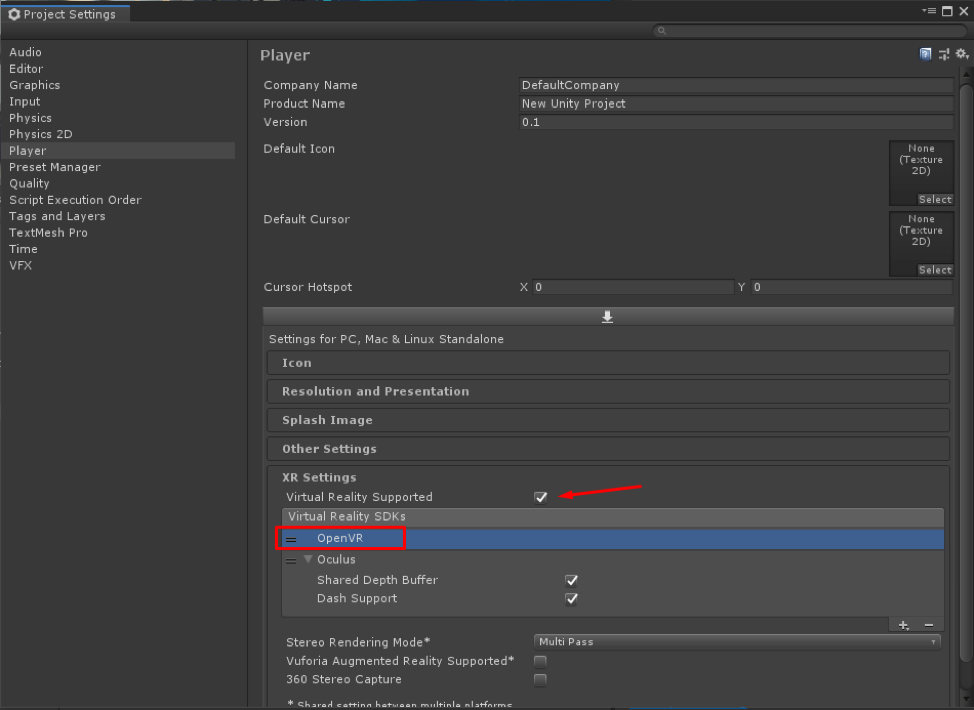
- Navigate to Player settings
- Depending on the Unity software version you might have either an XR Settings or Other Settings section available
- In Player Settings, under XR Settings enable Virtual Reality Supported
- Drag the OpenVR option above the Oculus option in the Virtual Reality SDKs list or remove Oculus support if it’s not needed in the project
- Navigate to Edit > Project Settings > Quality
- Set V Sync Count to Don’t Sync

Recommended Unity settings
We recommend applying the following settings for creating a better VR experience:
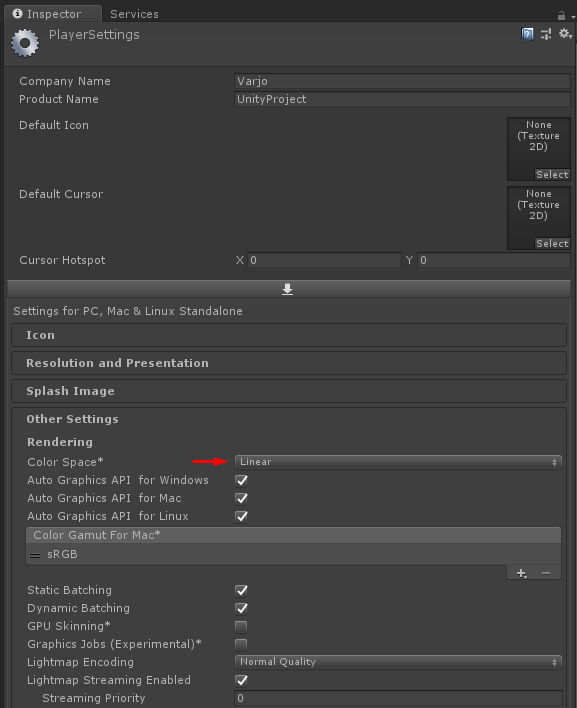
Color space
- Navigate to Edit > Project Settings > Player
- Under Other Settings set Color Space to Linear
You can read about the benefits of the Linear Color Space in Unity documentation. In short, it makes the colors appear better.
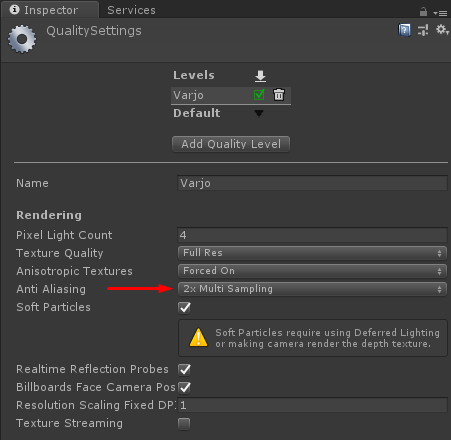
Anti-aliasing
- Navigate to Edit > Project Settings > Quality
- Set Anti–Aliasing to 2x Multi Sampling
- Normally in a VR project, you would set Anti-aliasing as high as possible. However, since the Varjo headset is using the human-eye resolution Bionic Display™, you can save resources otherwise spent on anti-aliasing while still getting a great image quality.
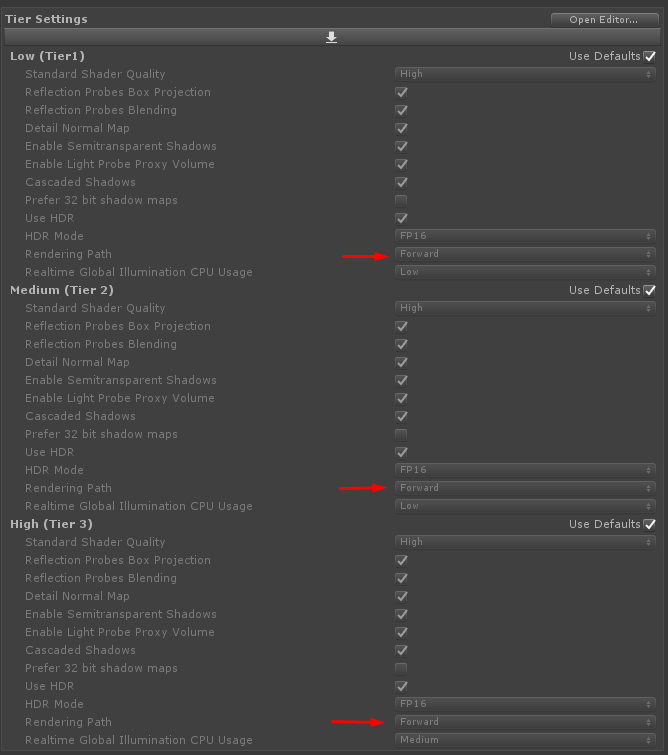
Rendering path
- Anti–Aliasing requires Rendering path set to Forward
Get familiar with Varjo plugin’s assets
Here are the files you can expect to find in your project after successfully installing the Varjo plugin and creating/importing your project.
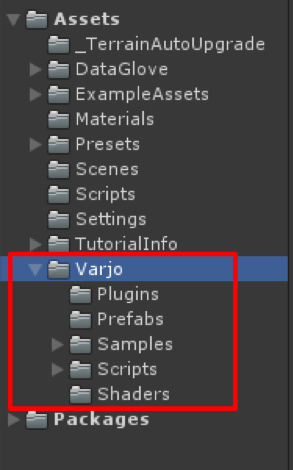
Plugins folder
Varjo dll files.
Prefabs folder
VarjoCameraRig Prefab
.png)
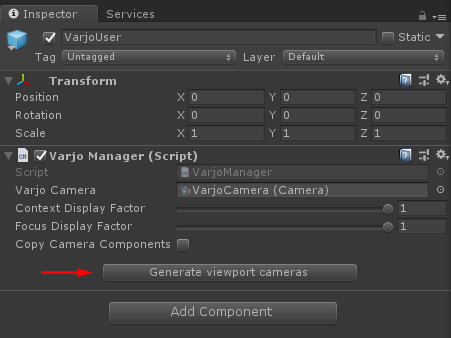
VarjoCameraRig: Assigns VarjoManager. VarjoCameraRig and tracking to be bound to each other. It is used for teleportation in the VR environment while keeping real world bounds intact.
VarjoCamera: Prototype for view cameras. All applicable settings and scripts are used from this to render for Varjo. If you want to expose view cameras for individual customization, you may do so from the VarjoManager inspector in VarjoUser.
Viewport cameras can be generated by selecting Generate viewport cameras. If you have the Copy Camera Components checkbox selected, the components of the VarjoCamera are copied to each of the individual view cameras.
Samples folder
The Varjo plugin for Unity is supplied together with the examples and you can see them in the Samples folder. These are covered on Unity Examples page.